After ten years of using my cheap webhost I have finally took the plunge and decided to utilise my day-job skills, and move my website to AWS. If you’re interested in knowing how to self host your own blog for only £3.50 per month, read on…
So firstly, I tell a lie, the hosting is only £3.50 a month – which for dedicated hosted, is cheap! Usually for that price you’d be using a shared hosting solution, which can be both slow and unreliable. There is another cost, which is your domain, normally £7.50 – £10 per year for a basic .co.uk or .uk domain. But that extra cost equates to what, a can of coke a month? But I digress..
Firstly you’ll need to signup to AWS, and I would highly recommend that you use a STRONG password followed by using MFA. You wouldn’t want your account getting compromised and someone running some expensive EC2 instances…With that I would also setup budget alerts. An alert for $10 should be sufficient. (inb4 $, yes, AWS is American)
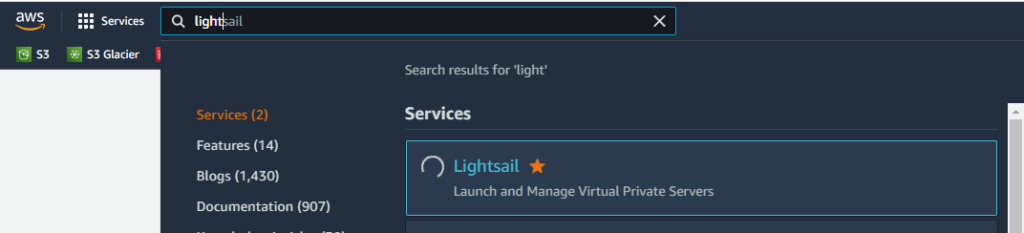
- Once you are logged in, search for the “Lightsail” service
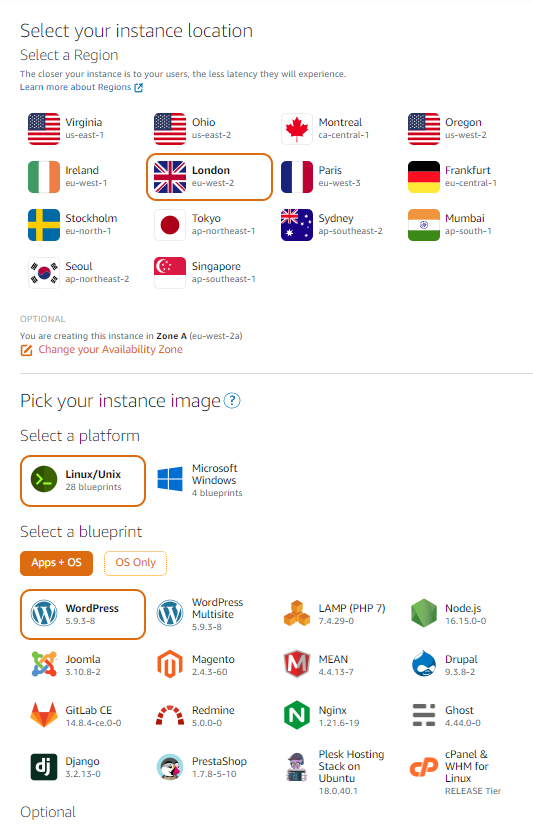
- We’re going to change the availability zone to London – or the country closest to you
- Run your image using Linux
- Select “Wordpess” as your install option – not multisite
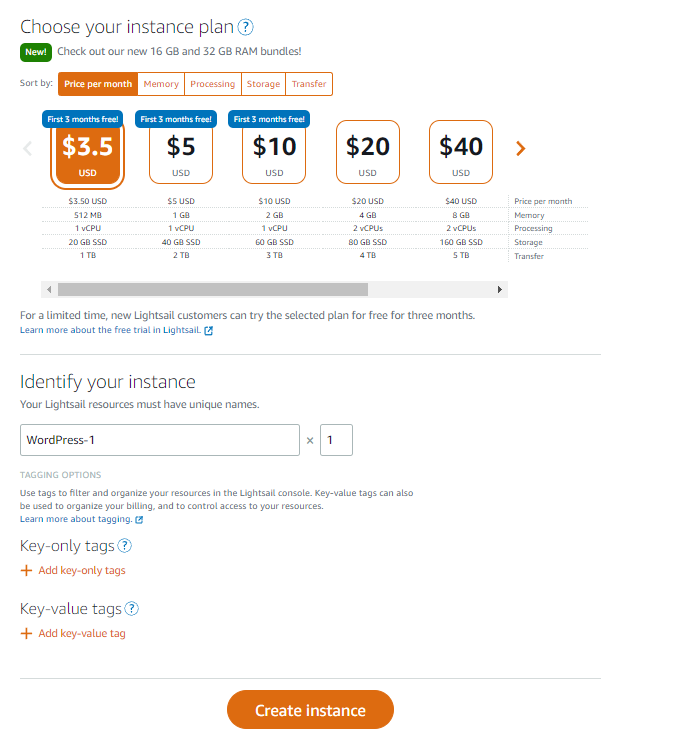
- For now, choose the $3.50 p/month package, but you can always upgrade later if you find speeds slow or the instance is underperforming
- Give your instance a name.
- Click create (the key tags can be ignored)
- It won’t take look for AWS to spin up our instance. Under instances once created, we are going to want to ensure the IP address is static, click the hamburger menu and click “manage” and click the network tab.
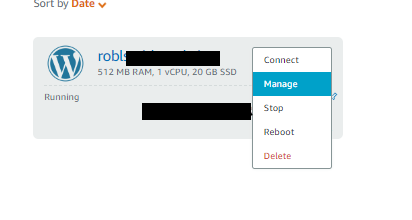 There will be a big button which says “Create static IP”, click that. It should then assign that IP to the instance. Therefore if it was to ever reboot, it still has the same IP.
 - Using that IP we can visit the WordPress blog, but first, we need to find the password to login.
On the previous screenshot is the hambuger menu. There is a option called “Connect” clicking that will open a terminal window. The password is stored within a file called “bitnami_application_password” is you cat this filecat bitnami_application_passwordit will output the password to login to WordPress (remember to change this) - Now what good is an IP address for a website, well for humans… we’re going to need to point a domain to it. Now I use a registrar outside AWS.
On the main Lightsail we need to click the “Networking” tab and create a DNS Zone for your domain, e.g. if it was myblog.xyz, you would type that in here.
You would then click “create DNS Zone” and take note of the nameservers it outputs, you would them use them on your domain’s registrar domain manager whoever it asks you to input them. - On the networking tab, click the hamburger menu on the global DNS zone and click manage. Here we can add a new A Record to point the domain to the static IP.
Click “Add record” and use@as the subdomain to point the main website, then for IP, it should automatically suggest the IP address as the static IP.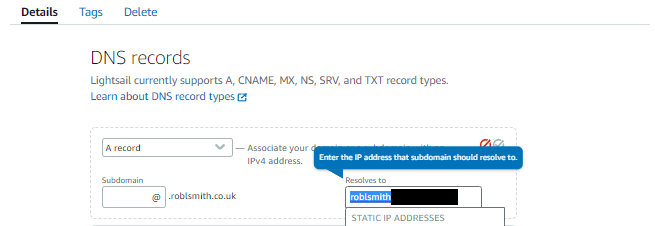
Once this is saved and propagated, you should be able to visit your website through a domain. - Your next step would be to install HTTPS / SSL via LetsEncrypt! AWS have a guide on this here
- Happy blogging!
Note – my first AWS bill was 17p – this is because I was also running a couple of snapshots. These do have a minimal extra cost, and maybe a tad more outside the free tier.